Feb 7, 2026 | Facebook tips
Facebook remains one of the most powerful platforms for businesses and creators seeking to engage audiences, build communities, and drive measurable results. However, posting regularly without understanding how your content performs is mostly guesswork. Facebook Analytics, though officially retired, has evolved into Meta Business Suite and Facebook Insights, offering powerful ways to analyze performance, track trends, and optimize content to increase engagement. Understanding these tools is essential for anyone aiming to grow their page efficiently.
This guide will walk you through how to use Facebook Analytics to boost page engagement, step by step, covering metrics, analysis techniques, and actionable strategies to maximize reach and interaction.
What Is Facebook Analytics? (And What Replaced It)
Facebook Analytics was a dedicated platform for monitoring user behavior across Facebook and Instagram, including detailed insights about interactions with content and conversion tracking. Facebook retired this tool in 2021, replacing it with a combination of Facebook Insights and the Meta Business Suite. While the older Analytics platform offered cross-platform analysis, Insights focuses specifically on page-level data, such as post engagement, audience demographics, and content performance.
Today, Meta Business Suite brings both scheduling and analytics under a single interface, allowing businesses to access key metrics for engagement, content reach, and follower growth in one place. Despite the change, the principles of Facebook Analytics remain vital, as data-driven insights guide smarter posting decisions and more effective audience engagement.
Facebook Analytics vs Facebook Insights
While Facebook Analytics tracked comprehensive cross-platform user behavior, Facebook Insights focuses on the performance of a single page or account. Insights provides information about the reach of individual posts, the interaction types those posts receive, and the demographics of users engaging with content.
By using Insights within the Meta Business Suite, marketers can see engagement trends, measure content effectiveness, and develop strategies tailored to their audience’s preferences. The replacement tools may not offer every feature of the old Analytics, but they provide all the critical data necessary to improve engagement.
Meta Business Suite Overview
Meta Business Suite centralizes Facebook and Instagram management, offering a comprehensive way to monitor and optimize content. Through the suite, page owners can review engagement metrics for posts and stories, track follower growth, and observe audience demographics.
It also allows scheduling content and responding to messages, making it an all-in-one platform for managing both content and performance data. By integrating Insights with business management tools, Meta Business Suite ensures that every engagement decision is supported by reliable metrics, enabling businesses to adjust strategies in real time.
Why Facebook Analytics Still Matters for Engagement
Even though Facebook Analytics as a platform no longer exists, understanding its key concepts remains crucial. Tracking engagement metrics allows you to identify content that resonates with your audience, determine the optimal times to post, and experiment with formats that drive interaction.
Without this data, content decisions are based on assumptions rather than evidence, which often leads to lower engagement. By applying the principles of Analytics, page managers can make data-driven adjustments that improve both reach and interaction, creating a sustainable growth strategy.
Why Facebook Analytics Is Critical for Page Engagement
Engagement is more than just a count of likes or shares. It directly affects the visibility of posts in the Facebook feed, as the algorithm prioritizes content that generates meaningful interactions. Higher engagement signals relevance, prompting the platform to show the content to a wider audience. Analytics enables page managers to distinguish between content that performs well and content that underperforms, ensuring that time and resources are invested in posts that genuinely capture audience interest.
Using data, marketers can move away from guesswork, creating strategies informed by trends, audience behavior, and historical performance patterns. Insights can also reveal common mistakes, such as posting at ineffective times, relying on a single content format, or ignoring follower activity patterns.
Key Facebook Engagement Metrics You Must Track
Engagement rate is a fundamental metric, measuring the proportion of your audience that interacts with content. It is calculated by dividing the sum of likes, comments, shares, and saves by the total reach of a post and multiplying by 100. Monitoring this metric reveals how well content resonates with the audience. Another critical comparison is reach versus impressions. Reach shows the number of unique users who saw a post, while impressions reflect total views, including multiple views by the same user. Understanding both metrics is essential to differentiate between attracting new viewers and encouraging repeat interactions.
Interactions themselves offer varied insights. Likes indicate general approval, comments show meaningful engagement, shares extend your content’s reach to new audiences, and saves highlight long-term interest. Video content requires further analysis, including watch time, retention rate, and click-throughs.
Tracking these video metrics helps refine video strategy, ensuring viewers remain engaged and complete the content. Follower growth and activity patterns are equally important, offering a broader understanding of audience behavior, which informs posting schedules, content topics, and formats.
How to Access Facebook Analytics and Insights
While Facebook Analytics has been retired, similar insights are accessible through the Meta Business Suite. By logging into Meta Business Suite, page owners can monitor engagement trends for both posts and stories, analyze reach and impressions, and schedule content. The Insights dashboard is structured into sections that provide an overview of reach, engagement, and follower growth, as well as detailed content performance and audience demographics. Customizing views allows marketers to focus on specific post types, compare organic versus paid performance, and track engagement trends over selected timeframes, making analysis more precise and actionable.
How to Analyze Post Performance Step by Step
Analyzing post performance begins with identifying top-performing content. Posts that generate high engagement, shares, and comments indicate topics and formats your audience prefers. Conversely, spotting underperforming content helps avoid repeating strategies that fail to capture attention.
Comparing different content types, including video, image, link, or text posts, provides insights into which formats resonate most effectively. Additionally, separating organic engagement from paid promotion helps understand authentic audience preferences, allowing marketers to fine-tune content without over-reliance on advertising.
Using Audience Insights to Increase Engagement
Understanding your audience is critical to improving engagement. Demographics such as age, gender, and location provide context for content development, while insights into interests and device usage inform format and timing decisions.
Analyzing activity patterns reveals the best time and day to post, ensuring content appears when followers are most active. Further refinement comes from location and language insights, which allow for localizing content to maximize relevance. By aligning content style, tone, and format with audience behavior, page managers can significantly increase interaction and follower loyalty.
Turning Facebook Analytics Data into Action
Data becomes valuable only when applied strategically. Metrics help optimize content formats, guiding decisions such as prioritizing video over image content if historical trends show higher engagement.
Analytics can also inform improvements to captions, calls-to-action, and post length to encourage interactions. Refining posting frequency based on audience activity ensures content appears consistently without overwhelming followers. A/B testing content variations, such as headlines, visuals, and posting times, further leverages insights to maximize engagement outcomes.
Common Facebook Analytics Mistakes to Avoid
Focusing solely on likes can be misleading, as they do not fully represent meaningful interactions. Ignoring long-term trends can result in short-sighted decisions, and overreacting to temporary drops in engagement may lead to unnecessary content changes.
Benchmarking new content against past performance is critical, providing context for metrics and helping marketers distinguish between normal fluctuations and genuine opportunities for optimization.
Advanced Tips to Boost Engagement Using Analytics
Tracking engagement trends over extended periods helps identify consistently successful content and seasonal or weekly patterns. Combining Insights with third-party tools allows for deeper analysis, including cross-platform engagement and competitor benchmarking.
Analytics also supports content calendar planning, aligning post scheduling with audience activity and historical performance. Scaling what works consistently ensures that high-performing content types, formats, and posting schedules are emphasized while low-performing approaches are refined or discontinued.
Final Words
Using Facebook Analytics effectively is not about collecting numbers; it is about interpreting data to inform decisions and optimize strategies. By understanding engagement metrics, monitoring audience behavior, and applying insights to content creation, businesses and creators can improve reach, foster meaningful interaction, and achieve sustainable page growth.
A structured, analytics-driven approach ensures every post resonates with the right audience at the right time, maximizing engagement. For further guidance on growing your Facebook presence and optimizing content performance, visit Boost Social Media for professional tips and strategies.
Feb 6, 2026 | Facebook tips
For businesses and marketers, Facebook remains one of the most powerful platforms for connecting with audiences and driving results. However, knowing how to invest your marketing budget effectively can be challenging. Two popular strategies often come up: purchasing paid likes and running Facebook Ads. Both promise engagement, but their impact on your ROI or return on investment can vary dramatically.
Understanding the nuances between these options is key. Paid likes may offer quick engagement boosts, while Facebook Ads provide precise targeting and measurable results. This guide explores each strategy, compares their ROI potential, and offers actionable tips for maximizing your social media performance.
What Are Paid Likes?
Paid likes involve purchasing interactions on your Facebook page or posts. The idea is straightforward: you pay a service or platform to deliver a specific number of likes, making your content appear more popular.
While this may improve perceived credibility, it doesn’t always translate into meaningful engagement, website traffic, or sales. Paid likes are often used for vanity metrics—to make a page look active—but the quality of interactions varies widely.
What Are Facebook Ads?
Facebook Ads are paid campaigns run directly through Facebook’s Ads Manager. Unlike paid likes, ads allow you to:
- Target specific demographics, locations, and interests
- Optimize for clicks, conversions, or impressions
- Track performance in real-time and adjust budgets accordingly
Facebook Ads are a structured approach to paid promotion. Their value lies in measurable ROI and the ability to reach users who are more likely to convert.
Why ROI Matters in Facebook Marketing
ROI is the metric that measures the effectiveness of your marketing spend. In Facebook marketing, it’s not just about likes or followers; it’s about tangible outcomes—leads, sales, subscriptions, or other conversions.
Focusing on ROI helps businesses avoid wasting money on tactics that look impressive but don’t drive results. Whether you choose paid likes, Facebook Ads, or a combination, the ultimate goal is to maximize returns while minimizing unnecessary spending.
Pros and Cons of Paid Likes
Advantages of Paid Likes
- Quick Engagement Boost: Paid likes can rapidly increase the number of likes on a page or post, making your content appear popular.
- Perceived Social Proof: A higher like count can influence new visitors to trust your brand or engage with your content.
- Low Complexity: Unlike Facebook Ads, paid likes require minimal setup and technical knowledge.
Disadvantages of Paid Likes
- Low Conversion Potential: Likes from purchased services rarely translate to clicks, leads, or sales.
- Fake Engagement Risks: Some paid likes come from bots or inactive accounts, which can hurt credibility if discovered.
- No Targeting: You cannot choose who sees or interacts with your paid likes, limiting their strategic value.
When Paid Likes Can Be Useful
Paid likes may be appropriate in limited scenarios:
- Launching a new page to make it look active
- Running social experiments to test content appeal
- Boosting visibility for a specific post in the short term
However, these are short-term gains rather than sustainable marketing growth.
Pros and Cons of Facebook Ads
Advantages of Facebook Ads
- Precise Targeting: Ads allow marketers to reach specific demographics, behaviors, and interests.
- Measurable ROI: You can track clicks, conversions, and sales directly through Ads Manager.
Flexible Objectives: Optimize campaigns for traffic, engagement, lead generation, or direct sales.
- Scalable Strategy: Ads can be adjusted for budget and reach as your campaign evolves.
Disadvantages of Facebook Ads
- Cost: Ads require investment, and costs can escalate if not managed properly.
- Learning Curve: Understanding targeting options, ad formats, and optimization techniques can be complex.
- Time-Intensive Setup: Crafting compelling ad copy, designing creative visuals, and monitoring campaigns requires ongoing effort.
Best Practices for Facebook Ads
- Set clear campaign objectives before launching.
- Use A/B testing to identify the most effective ad creatives.
- Monitor frequency and ad fatigue to maintain engagement.
- Optimize for conversions rather than just clicks or impressions.
- Track performance metrics to adjust targeting and budget efficiently.
Paid Likes vs Facebook Ads: ROI Comparison
Cost vs Benefit Analysis
While paid likes are typically cheaper upfront, their ROI is limited. You might spend $50 for 1,000 likes, but if none of those accounts engage meaningfully, the return is minimal. Conversely, Facebook Ads may cost more per campaign, but precise targeting ensures your budget reaches people more likely to convert.
Engagement Quality and Conversion Potential
Paid likes boost numbers but rarely impact conversion rates. Facebook Ads generate interactions from real users who are interested in your product or service, creating higher-quality engagement. For businesses focused on sales, leads, or actionable clicks, ads outperform paid likes consistently.
Long-Term vs Short-Term Impact
Paid likes provide a quick, superficial boost but offer little long-term value. Facebook Ads, when optimized correctly, contribute to sustainable growth. Over time, ads help build an audience that can be retargeted and nurtured, increasing customer lifetime value.
Expert Tips for Maximizing ROI on Facebook
Combining Organic, Paid Likes, and Ads
A hybrid approach can be effective:
- Use organic content to engage loyal followers.
- Employ paid likes sparingly to enhance social proof on key posts.
- Invest in Facebook Ads to reach a broader, targeted audience with conversion-focused campaigns.
Targeting the Right Audience
ROI improves dramatically when ads reach the right people. Segment audiences based on:
- Demographics (age, location, gender)
- Interests and behaviors
- Website visitors or lookalike audiences
This ensures every dollar spent contributes to meaningful engagement and conversions.
Tracking Performance Metrics Effectively
To maximize ROI, track these key metrics:
- Click-through rate (CTR)
- Cost per click (CPC) and cost per conversion
- Engagement rate (comments, shares)
- Return on ad spend (ROAS)
Regularly reviewing performance allows for real-time adjustments, improving both efficiency and outcomes.
Case Studies / Real Examples
Small Business Success with Facebook Ads
A boutique e-commerce brand increased revenue by 35% in two months using targeted Facebook Ads. They optimized for conversions, focused on lookalike audiences, and monitored ROAS closely. Each campaign delivered measurable sales rather than just likes, demonstrating the long-term advantage of ads over paid likes.
When Paid Likes Fell Short
A local café purchased 2,000 likes on a new Facebook page. While the page looked popular, the majority of “fans” were inactive accounts. Engagement on posts remained low, and foot traffic from Facebook did not increase. This example underscores that paid likes alone rarely produce meaningful business results.
FAQs
Are paid likes worth it for Facebook marketing?
Paid likes can provide temporary social proof, but they rarely translate into meaningful engagement or sales. Use them sparingly and focus on ads for better ROI.
How do Facebook Ads compare to buying likes in ROI?
Facebook Ads typically deliver higher ROI because they target real users who are more likely to engage, click, or convert, unlike purchased likes, which often consist of inactive accounts.
Can paid likes improve organic reach on Facebook?
Paid likes may slightly influence visibility by making posts appear popular, but Facebook’s algorithm prioritizes meaningful engagement. Organic reach gains are limited.
How do I track ROI from paid Facebook campaigns?
Use Ads Manager to monitor metrics like CTR, CPC, conversions, and ROAS. These numbers indicate how efficiently your ad spend translates into tangible results.
Can combining paid likes and Facebook Ads boost results?
Yes, when used strategically. Paid likes can enhance social proof, while ads drive conversions. Focus on metrics to avoid spending on ineffective tactics.
Is it better for small businesses to use paid likes or Facebook Ads?
Facebook Ads are generally more effective for small businesses seeking measurable growth. Paid likes are not recommended as the primary strategy due to low conversion potential.
Feb 5, 2026 | Facebook tips
In today’s competitive social media landscape, simply posting a video on Facebook isn’t enough. One of the most important indicators of your content’s visibility is Facebook views. Understanding what counts as a view, how it affects your reach, and whether buying views can strategically help is essential for anyone serious about growing their audience.
This guide explains the ins and outs of Facebook views, including organic growth strategies, paid options, risks, and practical tips to boost engagement safely.
Understanding Facebook Views
Before considering buying views or running campaigns, it’s essential to understand what Facebook views actually mean and how they are counted.
What Counts as a Facebook View?
A Facebook view is recorded when someone watches your video. However, Facebook measures views in different ways depending on the duration and type of engagement. The most common metrics include:
- 3-second views, which are the most basic measurement.
- 10-second views, which help filter out accidental or brief plays.
- ThruPlay, a metric used in advertising, counts viewers who watch at least 15 seconds or the full video if shorter.
The type of view you focus on should align with your goals. Short 3-second views may boost numbers superficially, but longer watch times signal genuine interest to Facebook’s algorithm.
How Facebook Measures Video Views
Facebook tracks views using its algorithm, distinguishing between unique viewers and repeat plays. Factors that influence view counts include whether the video auto-plays in a feed, the viewer’s interaction with the content, and the duration they watch. Essentially, the algorithm prioritizes videos that keep viewers engaged, which can improve reach and visibility over time.
Organic vs Paid Views: Key Differences
Organic views come naturally from your followers, shares, and user discovery. These views indicate real interest and help build trust. Paid views come from ads or purchased services that increase your numbers artificially. While paid views can accelerate visibility, they may not always translate into meaningful engagement unless combined with a strategic approach.
Why Facebook Views Matter for Reach and Engagement
Views are more than just numbers; they influence your content’s reach and perceived credibility.
How Views Influence the Facebook Algorithm
Facebook favors content that keeps people watching. Videos with higher view counts, longer watch times, and consistent engagement are more likely to appear in users’ feeds. This means that views can indirectly increase your reach, giving your content a better chance of being discovered by a wider audience.
The Role of Views in Social Proof and Credibility
High view counts also act as social proof. People are naturally drawn to content that others have engaged with. Videos with substantial views often receive more clicks, shares, and comments, enhancing your credibility and signaling value to both your audience and the Facebook algorithm.
Real-Life Examples of Increased Reach Through Views
Consider a small business sharing a product demo. With just a few hundred views, the video reaches only the immediate audience. If the same video gains thousands of views, it’s more likely to appear in suggested feeds, shared posts, or group recommendations, dramatically increasing organic reach.
Buying Facebook Views: What You Need to Know
Buying views can provide a short-term boost, but it’s important to approach it strategically and safely.
How Buying Facebook Views Works
When you buy Facebook views, you pay a service to increase the number of people who have “watched” your video. Reputable services use real accounts and gradual delivery to mimic natural viewing patterns. Some providers rely on bots or fake accounts, which can temporarily inflate numbers but may pose risks to your account.
At Boost Social Media, we focus on safe strategies to increase video visibility while prioritizing authentic engagement.
Pros and Cons of Buying Views
Buying views offers immediate advantages, such as improving social proof, making your content look popular, and potentially encouraging organic growth. However, purchased views rarely generate meaningful engagement on their own. Relying solely on artificial boosts can also conflict with Facebook’s policies and limit long-term growth.
Choosing a Safe and Reliable Service
If you decide to buy views, prioritize services that use real accounts, provide gradual delivery, and have positive reviews or case studies demonstrating safe results. Quality matters more than quantity thousands of authentic views are more valuable than tens of thousands of fake ones.
Alternatives to Buying Views for Boosting Reach
While purchasing views can provide a temporary boost, organic strategies and smart advertising often deliver better long-term results.
Organic Growth Strategies
Posting at times when your audience is most active, engaging with comments, and creating content that encourages sharing are powerful ways to attract views naturally. Optimizing your videos for watchability, including captions and clear storytelling, helps retain attention and increases the likelihood of shares.
Leveraging Paid Ads Effectively
Instead of buying views directly, running targeted Facebook Ads can increase exposure while attracting genuine engagement. Ads allow you to reach specific audiences, measure performance, and optimize campaigns to drive meaningful interactions rather than just inflated numbers.
Creating High-Engagement Content
The most reliable way to boost views is to create content people actually want to watch. Focus on clear storytelling, concise messaging, and visually engaging elements. Ending videos with a call-to-action encourages shares and comments, which further increases reach organically.
Risks and Ethical Considerations
Buying views isn’t risk-free. Understanding Facebook’s policies and ethical considerations is crucial.
Facebook’s Policies on Purchased Views
Facebook prohibits fake engagement and spammy tactics. Violating these policies can result in reduced reach, removal of content, or even account suspension. Any strategy that artificially inflates metrics without real engagement carries risk.
Avoiding Spammy or Fake Views
Be cautious of services offering extremely cheap, bulk views with no transparency. Look for providers that deliver gradual, realistic results, and focus on quality over quantity. Your reputation and account safety are more important than inflated numbers.
Measuring the Impact of Your Views on Reach
Tracking performance helps you evaluate whether your strategies are effective and where to focus future efforts.
Using Facebook Insights to Track Performance
Facebook Insights provides a detailed breakdown of video performance, including total views, unique viewers, average watch time, and retention rates. Monitoring these metrics regularly allows you to understand audience behavior and optimize content strategies.
Key Metrics Beyond Views
Views alone don’t tell the whole story. Likes, comments, and shares provide context for audience engagement. Videos with high view counts but low interaction may not truly resonate with your audience. Combining view counts with engagement metrics gives a fuller picture of performance.
Feb 4, 2026 | Facebook tips
Low engagement on Facebook isn’t just frustrating it directly affects your reach, visibility, and growth. Even with thousands of followers, small mistakes can drastically reduce likes, comments, and shares. Understanding these pitfalls and learning how to fix them is essential in 2026.
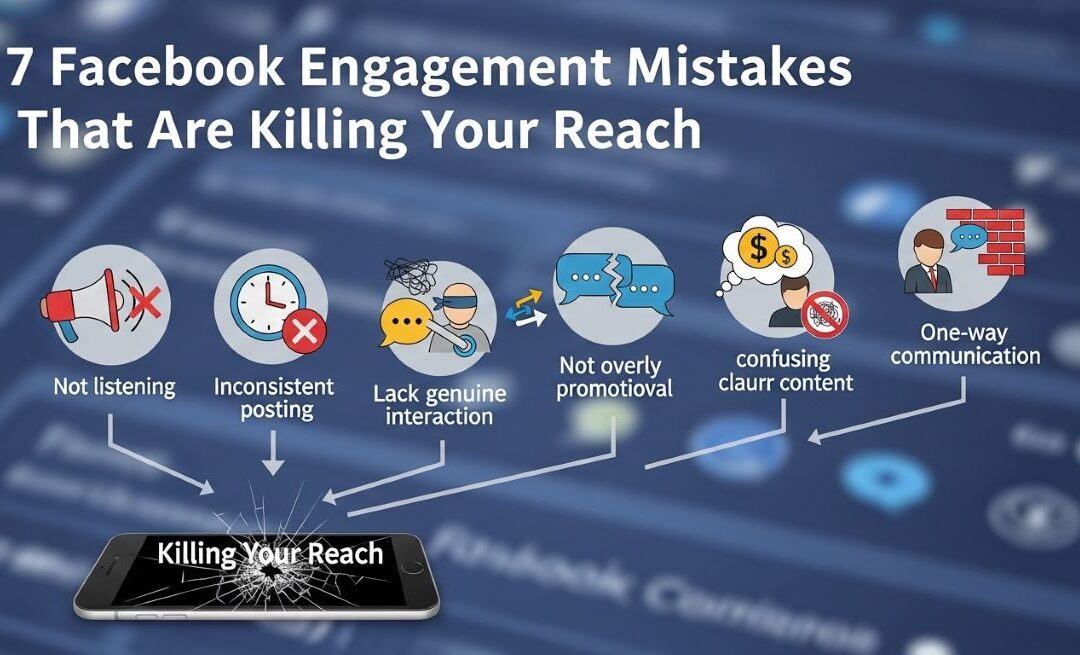
In this guide, we’ll explore the seven most common Facebook engagement mistakes, why they happen, and actionable solutions to improve your post performance.
Why Facebook Engagement Matters More Than Ever
Engagement is more than just a metric; it’s a signal to Facebook that your content is valuable. Likes, comments, shares, and clicks all determine how widely your posts are shown. A post with strong engagement has a higher chance of appearing in followers’ feeds, while content with little interaction can easily get buried.
The Facebook algorithm in 2026 prioritizes meaningful interactions, such as comments and shares, over passive likes. Videos that keep users watching or posts that spark discussion are given more reach. This means your engagement is often more important than your follower count. Even if you have thousands of followers, low interaction can limit your visibility. Engagement reflects connection and relevance true measures of your content’s impact.
Mistake #1: Posting Without Understanding Your Audience
Many brands make the mistake of posting content that isn’t tailored to their audience. Generic or irrelevant posts fail to capture attention, resulting in low engagement.
Facebook Insights provides valuable data about your audience’s demographics, active times, and which posts perform best. By analyzing this, you can understand what resonates with your followers and what falls flat.
The solution is to develop content pillars based on audience interests. Focus on 3–5 types of posts, such as tutorials, behind-the-scenes content, industry news, or user-generated stories. When you consistently post content that matches your audience’s needs, engagement naturally improves.
Mistake #2: Ignoring the Facebook Algorithm
Many page owners overlook how the algorithm decides what to show in feeds. Facebook prioritizes content that sparks conversations over posts that only gather likes. Comments, shares, and meaningful interactions have a higher impact on reach.
Certain content types perform better today. Short-form videos, Reels, and carousel posts tend to be favored, while posts that don’t invite interaction often go unseen.
To fix this, optimize your content for conversation. Ask questions, prompt your audience to share stories, and create posts that encourage discussion rather than passive scrolling. Shifting focus from likes to engagement will increase your visibility and reach.
Mistake #3: Posting at the Wrong Time (Or Too Often)
Timing matters. Even the best content will underperform if your audience isn’t online to see it. Many pages either post too frequently or at hours when followers are inactive, leading to wasted effort.
The ideal approach is to post 3–5 times per week, at times determined by your audience’s online activity. Facebook Insights can reveal when your followers are most active. Experimenting with posting times over a few weeks can help you identify the schedule that consistently drives engagement.
Mistake #4: Over-Promoting and Under-Engaging
Pages that focus heavily on promotion risk turning their content into a sales pitch. Constantly pushing products or services can drive followers away and reduce interaction.
A better strategy is to provide value, educate, or entertain first. When promotion is balanced with helpful or interesting content, your audience is more likely to engage. For instance, sharing tips, stories, or insights that relate to your product before adding a promotional post helps maintain connection and interest.
Mistake #5: Not Encouraging Interaction
Many posts fail because they don’t prompt the audience to act. Content that doesn’t invite comments, shares, or reactions often gets ignored.
You can fix this by asking thoughtful questions or creating posts that spark discussion. For example, asking your audience to share their experiences or opinions can generate meaningful conversation. Encourage participation naturally within your post captions or videos to increase engagement without feeling forced.
Mistake #6: Ignoring Comments and Messages
Engagement is a two-way street. Responding promptly to comments and messages signals to Facebook that your page is active, which can improve visibility. Ignoring interactions, on the other hand, can make your page seem inactive and discourage future engagement.
Building a comment-first habit is essential. Acknowledge mentions, answer questions, and respond with follow-up prompts to encourage further discussion. Active community management not only strengthens relationships but also signals the algorithm to expand your reach.
Mistake #7: Not Tracking What Actually Works
Many pages make decisions based on superficial metrics like likes or follower counts. This can be misleading, as true engagement includes shares, comments, saves, and click-throughs.
To improve, focus on metrics that matter. Track engagement rate, post saves, shares, and video watch time. Identify which content consistently performs best and replicate those formats. Continuously analyzing and adjusting your strategy ensures you invest time and effort where it counts.
Bonus Tips to Boost Facebook Engagement Faster
Short-form video, Reels, and interactive formats like polls and carousels are currently favored by the algorithm. Repurposing your best-performing posts into different formats can also help you reach more people. Experimenting with stories, interactive graphics, and questions can increase both reach and engagement.
By combining audience-focused content, strategic timing, and active community management, you can turn low engagement into a powerful growth driver.
Final Words
Low Facebook engagement isn’t permanent. It’s a signal that your strategy needs adjustment. By addressing common mistakes posting without audience insight, ignoring the algorithm, over-promoting, or failing to track results you can restore reach and interaction.
Focus on quality content, meaningful engagement, and consistent monitoring. Over time, these improvements compound, turning past errors into a roadmap for growth and stronger community connections.
Dec 3, 2025 | Facebook tips
Facebook remains one of the most powerful platforms for businesses, influencers, and content creators. With over two billion active users, it offers an incredible opportunity to reach audiences worldwide. However, standing out in such a competitive space is not easy. To attract attention, you need more than good content, you need visibility and social proof. That’s where having a strong base of Facebook page likes plays a major role.
If you’re serious about expanding your online presence, buying real Facebook page likes can help you gain traction faster and appear more credible. And when it comes to getting authentic likes from real profiles, one of the best platforms to rely on is Boost Social Media.
This article explains why buying Facebook page likes is a smart move for growing your reach and how Boost Social Media can help you build a trusted, influential presence on the platform.
The Importance of Facebook Page Likes
Likes on a Facebook page are more than just numbers, they represent trust, influence, and interest in your brand. When people see a page with a large number of likes, they automatically assume it’s reputable and worth following. This perception encourages new visitors to engage with your posts, follow your page, and even share your content.
A high number of page likes also improves how your posts perform in the Facebook algorithm. The more likes you have, the greater your chances of appearing in other users’ feeds. This naturally increases visibility, helping you reach audiences that you may not have reached otherwise.
In simple words, page likes are the foundation of your social proof. Without them, even high-quality content may go unnoticed.
Why Buying Facebook Page Likes Makes Sense
Growing a Facebook page organically takes time and patience. It’s possible—but very slow—especially if your page is new or doesn’t have existing engagement. Buying real Facebook page likes gives your profile the boost it needs to gain attention and credibility more quickly.
Here are some reasons why it’s worth investing in Facebook page likes:
1. Creates a Strong First Impression
When someone visits your Facebook page, the first thing they notice is your number of likes. A page with thousands of likes appears more credible and popular than one with only a few. This strong first impression can instantly make your brand look trustworthy and professional.
2. Helps Build Organic Growth
People tend to follow what others already like. Once your page gains a decent number of likes, it attracts more organic followers naturally. It’s a psychological effect known as “social proof” people are more likely to trust and engage with a page that others already support.
3. Improves Post Reach
Facebook’s algorithm prioritizes pages that show engagement. A higher number of page likes often translates into better reach for your posts, giving your content a chance to be seen by a larger audience.
4. Strengthens Brand Credibility
A well-liked page builds confidence in potential customers. Whether you run an online store, promote a service, or manage a public profile, having many page likes gives your brand authority and professionalism.
5. Saves Time and Effort
Organic growth can take months or even years. Buying real page likes from a trusted source like Boost Social Media can help you achieve results in days, allowing you to focus your time on creating quality content and growing your business.
Why Buy Facebook Page Likes from Boost Social Media
Not all websites deliver what they promise. Some use fake accounts or bots that disappear after a few days, which can hurt your credibility and even risk your Facebook page. This is why it’s crucial to buy from a trusted and professional service provider.
Here’s why Boost Social Media is the best place to buy Facebook page likes:
1. Real Likes from Active Accounts
Boost Social Media delivers real page likes from genuine and active profiles. These are not fake or inactive accounts, which ensures that your page growth looks natural and authentic.
2. Safe and Secure Process
Your privacy and safety are a top priority. Boost Social Media never asks for your password or sensitive information. All you need to provide is your page URL, and they handle the rest securely.
3. Fast Yet Gradual Delivery
Likes are delivered steadily to make the growth appear natural. You’ll start noticing results within a few hours, depending on your selected package.
4. Affordable Packages
Boost Social Media offers a range of packages to suit every budget, from small pages to large business profiles. Their prices are competitive, allowing you to grow your online presence without spending a fortune.
5. Dedicated Customer Support
Their professional support team is always available to help. Whether you have questions before buying or need assistance afterward, they respond promptly and courteously.
6. Proven Track Record
Boost Social Media has built a reputation as one of the most trusted platforms for social media growth services. Many satisfied customers continue to use their services because of the consistent results they deliver.
How to Buy Facebook Page Likes from Boost Social Media
Purchasing Facebook page likes is simple and straightforward. You can get started in minutes by following these steps:
Step 1: Go to boost-social-media.com and select “Facebook Page Likes.”
Step 2: Choose the package that best fits your goals and budget.
Step 3: Enter your Facebook page link. No passwords or personal data are required.
Step 4: Complete your secure payment.
Step 5: Sit back and watch as your page likes begin to grow.
Your likes will appear gradually, helping your page gain steady, authentic growth.
How More Page Likes Enhance Your Overall Performance
Once you’ve purchased real Facebook page likes, you’ll start noticing improvements not just in your numbers, but in your overall page performance. Here’s how:
- Better Engagement: More people are likely to comment, share, and react to your content.
- Improved Visibility: Your posts have a better chance of reaching new audiences.
- Higher Conversion Rates: A credible page increases trust, which can lead to more sales, sign-ups, or inquiries.
- Brand Recognition: A larger following helps your name or business become more recognizable on Facebook.
Tips to Maintain Growth After Buying Likes
Buying likes gives your page a strong start, but to keep the momentum going, you must stay active. Here are some ways to maintain consistent growth:
- Post regularly to keep your audience engaged.
- Share high-quality visuals, videos, and stories.
- Reply to comments and messages quickly to show genuine interaction.
- Use Facebook Insights to track performance and improve content strategy.
- Promote your posts occasionally for even greater reach.
By combining these practices with your purchased likes, your page will continue to grow and stay relevant.
Final Thoughts
In today’s competitive digital world, Facebook success depends on visibility, engagement, and credibility. Page likes to play a big role in achieving all three. Buying real Facebook page likes can help you stand out faster, attract organic followers, and build a trustworthy online image.
If you’re planning to invest in your page’s growth, make sure you buy from a genuine and secure source. Boost Social Media offers real, high-quality likes from active users at affordable prices. Their reliable service, fast delivery, and strong customer support make them the best choice for boosting your Facebook presence.
Start growing your page today with Boost Social Media and watch your reach, engagement, and credibility rise to the next level.
Jul 7, 2022 | Facebook tips
In the world of Facebook, there are these pesky things called bots – automated accounts that can bother you with spammy messages. But don’t worry! This guide is here to help you kick these bots out of your Facebook world.
Think of it as your shield against unwanted digital intruders. Whether you’re just looking to keep your Facebook clean and tidy or you’re a business owner wanting to protect your brand, we’ve got you covered.
We’ll show you simple steps to make sure that only real people and real interactions get through to your Facebook. So, let’s get started on this journey to block those pesky bots and keep your Facebook world bot-free.
What are Facebook Bots?
Introduction to Facebook Bots: Facebook Bots are automated software applications designed to perform specific tasks on Facebook. They simulate human activity, making interactions on the platform more efficient and user-friendly.
Primarily, these bots serve various functions like automating customer service queries, providing instant content delivery, and enhancing user engagement. They operate in Facebook Messenger, where they can answer questions, offer suggestions, and even facilitate transactions, significantly streamlining online interactions for both businesses and users.
How do Facebook Bots Work?
Facebook bots, or chatbots, are AI-driven programs on Facebook that engage users in natural conversations. They’re valuable for various purposes, including customer support and e-commerce.
One of their benefits is helping businesses boost their Facebook page likes organically. By providing valuable content and personalized recommendations, these bots enhance user experience and drive engagement.
Facebook bots offer 24/7 availability and efficiency, making them essential for streamlining processes and improving user satisfaction on the platform. Incorporating ‘Facebook page likes’ into their strategies can help businesses grow their online presence naturally.
How to stop bots from commenting on Facebook?
There are several strategies you can employ to stop spamming bots on Facebook. One option is to unsubscribe from or ban the bots. If you want fewer bot messages but still want to stay connected, consider unsubscribing.
To unsubscribe, simply send the bot a message with the words “Stop” or “Unsubscribe” to terminate your subscription. You will receive a communication informing you of the suspension of updates.
If you want to prevent bots from sending you messages in the future, you can disable them. To do this, follow these steps:
- Go to the chat screen on Facebook.
- Click the “Recent” tab to locate your chat.
- You will find two options: “Block sponsored communications” and “Block all messages.”
How Facebook Bots Can Contribute to Increased Revenue?
Facebook bots can significantly boost revenue through various means. They provide automated customer support, ensuring quick responses to inquiries and improving customer satisfaction, which ultimately leads to increased sales and loyalty. Additionally, these bots offer personalized product recommendations based on user data, increasing the likelihood of purchases. They streamline sales processes, assist in lead generation, and recover potentially lost revenue by addressing cart abandonment.
Bots excel at suggesting complementary products, upselling, and automating marketing campaigns, which can all contribute to higher revenue. By reducing operational costs and improving user engagement, Facebook bots prove to be valuable tools for revenue growth, making them an essential asset for businesses and individuals on the platform.
Key Preventive Measures Against Facebook Bots
To protect against Facebook bots and maintain online security, it’s essential to take specific preventive measures. Begin by adjusting your privacy settings to control who can interact with you, limiting access to trusted connections.
Be cautious when dealing with unfamiliar profiles, refraining from sharing sensitive personal information to safeguard your privacy. Use strong, unique passwords and consider enabling two-factor authentication for added security.
If you encounter accounts exhibiting bot-like behavior, promptly report them to Facebook. Familiarize yourself with common bot tactics and avoid clicking on suspicious links sent by unknown users. Regularly review and declutter your friend list to minimize the risk of bot interactions.
Prioritize interactions with verified pages and profiles to enhance your safety. Staying informed about Facebook’s security guidelines ensures that you remain well-prepared and protected against Facebook bots, contributing to a secure and enjoyable experience on the platform.
Block All Facebook Messages
To take more drastic action and ensure that you don’t receive any messages from bots on Facebook in the future, you can utilize the “Block all messages” feature. This powerful option will effectively put a stop to any messages originating from bots, providing you with peace of mind and a clutter-free messaging experience on the platform. By activating this feature, you can enjoy a bot-free Facebook messaging environment, allowing you to focus on genuine conversations with friends and contacts without unwanted interruptions from automated messages.
Block Sponsored Messages on Facebook
Bots often initiate conversations on Facebook to promote products or services related to your search queries. If you still want to receive messages from the bot but wish to block sponsored communications, you can enable the “Block sponsored messages” option. This allows you to ask your questions on Facebook without attracting unwanted promotional content.
FAQs
Why would I want to block bots?
Blocking bots can help reduce unwanted messages and promotional content in your Facebook chats.
Can I report a bot on Facebook?
Yes, you can report a bot for spam or suspicious activity.
Can I block sponsored messages from bots?
Yes, you can block sponsored messages to avoid promotional content.
What if the bot doesn’t stop messaging me?
If a bot continues to message you, you can try unsubscribing or reporting it.
Can I prevent bots from sending friend requests?
Adjust your Facebook privacy settings to control who can send you friend requests.
Conclusion
In the world of Facebook, where genuine connections matter, blocking pesky bots is a top priority. Understand what bots are, spot their tactics, and use simple methods to enhance online security. This guide equips you with the tools for a safe, authentic, and enjoyable Facebook experience, regardless of your experience level. Let’s start and bid those bots farewell together.