Feb 18, 2026 | Facebook tips
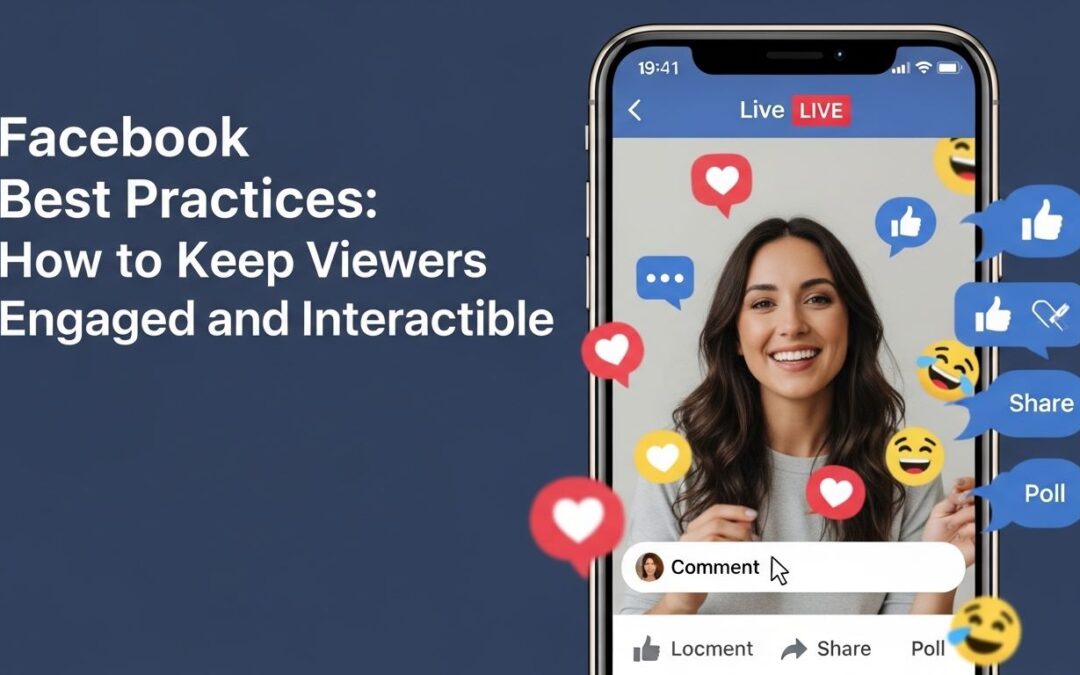
Facebook Live has transformed how businesses, creators, and marketers connect with audiences in real time. Unlike pre-recorded videos, live streaming fosters authentic engagement, real-time interaction, and higher retention if done correctly.
However, going live without a plan often results in low engagement, dropped viewers, and missed opportunities. This guide provides actionable Facebook Live best practices to keep viewers hooked and interacting from start to finish.
Why Facebook Live Engagement Matters More Than Ever
Live video has surged in popularity because it prioritizes interaction over passive consumption. Facebook’s algorithm rewards videos that spark comments, shares, and reactions, meaning engagement directly impacts reach.
How the Facebook Live Algorithm Rewards Interaction
Facebook’s algorithm favors live streams that generate real-time engagement. Comments, reactions, and shares signal content relevance. When viewers interact during a broadcast, Facebook boosts the video in feeds, notifications, and suggested content.
- Comments: Each comment indicates viewer involvement and sparks conversation.
- Reactions: Likes, loves, and other reactions signal emotional response.
- Shares: Shared streams extend reach and attract new viewers.
Engagement vs Views: What Actually Drives Reach
Views are vanity metrics if engagement is low. A video with thousands of passive viewers will not rank higher than one with fewer viewers who actively comment and react. Focus on fostering interaction to drive visibility, not just counting viewers.
Pre-Live Best Practices (Before You Go Live)
Preparation is critical for maximizing engagement. Successful live streams are rarely spontaneous; they are planned with purpose.
Choose the Right Topic Your Audience Wants Now
Selecting a relevant topic ensures viewers tune in. Consider:
- Audience polls or surveys to identify interests.
- Trending topics in your niche.
- Seasonal or event-based content.
For example, a fitness brand could go live demonstrating a quick 15-minute at-home workout during peak New Year fitness interest.
Schedule Your Facebook Live for Peak Audience Times
Timing affects live viewership. Analyze past engagement metrics and target periods when your audience is most active. Common peaks include early evenings and weekends, depending on your audience demographic.
Create a Compelling Live Video Title and Description
Your title should:
- Clearly communicate the value viewers will receive.
- Include keywords naturally (e.g., “How to Boost Facebook Engagement with Live Videos”).
- Be concise and attention-grabbing.
The description should expand on the title and set expectations for content and interaction opportunities.
Promote Your Facebook Live in Advance
Give your audience a heads-up to maximize attendance:
- Post announcements on your page and in Stories.
- Send email reminders to subscribers.
- Encourage followers to set notifications for your live session.
A short teaser video highlighting key topics or incentives can significantly increase anticipation.
Prepare an Interaction Plan
Engagement doesn’t happen by accident. Prepare:
- Questions to ask viewers throughout the stream.
- Polls to spark participation.
- Calls-to-action (CTAs) for shares, comments, and reactions.
Having a plan ensures interaction remains steady from start to finish.
How to Hook Viewers in the First 60 Seconds
The first minute is crucial. Many viewers decide whether to stay or leave almost immediately.
Start with a Strong Verbal Hook
Avoid small talk. Begin with a bold statement, statistic, or question to grab attention instantly. For example:
- “Did you know 80% of Facebook Live viewers drop off in the first two minutes? Here’s how to stay until the end…”
Clearly State What Viewers Will Gain by Staying
Tell viewers what they’ll learn, see, or receive by watching the entire session. Transparency increases retention.
- “Stick around to see the top 5 hacks to triple your engagement in under 10 minutes.”
Encourage Early Engagement
Prompt viewers to interact from the start:
- Ask them to comment where they’re watching from.
- Encourage reactions to a yes/no question.
- Suggest they share the live stream with friends.
Early engagement signals the algorithm and sets the tone for the stream.
Best Practices to Keep Viewers Engaged During Facebook Live
Sustaining attention requires energy, structure, and interactivity.
Talk With Viewers, Not At Them
Address viewers directly, ask their opinions, and respond in real time. This fosters a sense of community and connection.
Ask Strategic Questions Every Few Minutes
Use questions to maintain dialogue:
- “Which of these strategies do you already use?”
- “Type 1 if you’ve tried this tip before.”
Questions keep the audience thinking and typing, boosting engagement.
Use Viewers’ Names to Build Real-Time Connection
Acknowledging viewers personally makes them feel seen. Use the names from comments when responding:
- “Great point, Sarah! I love how you…”
Acknowledge Comments and Reactions Live
Responding to comments in real time signals activity to both the algorithm and viewers. Highlighting interesting comments encourages others to participate.
Use Visual Cues, Demonstrations, or Screen Sharing
Engage multiple senses:
- Show products or tools live.
- Share slides or screens to illustrate points.
- Use props to demonstrate key ideas.
Variety prevents monotony and sustains attention.
Maintain Energy, Pacing, and Clarity
Avoid a monotone delivery or overly long tangents. Keep content fast-paced, energetic, and easy to follow.
Proven Interaction Techniques That Boost Watch Time
Increasing watch time improves Facebook Live’s algorithmic ranking and viewer satisfaction.
Run Live Q&A Segments
Invite viewers to submit questions throughout the broadcast and answer them live. This boosts participation and retention.
Use Mini Cliffhangers to Prevent Drop-Off
Tease upcoming content mid-stream:
- “In just a few minutes, I’ll reveal a tool that can double your engagement overnight…”
This encourages viewers to stay tuned.
Offer Live-Only Incentives or Announcements
Provide special offers, exclusive tips, or announcements during the live session. Scarcity and exclusivity motivate continued watching.
Pin Comments and Highlight Key Points
Pinning comments or important tips ensures viewers see critical information and increases interactivity.
Technical Best Practices That Improve Viewer Retention
Even perfect content can fail if technical quality is poor.
Recommended Video Length for Facebook Live
- Short, focused sessions (10–20 minutes) work best for casual audiences.
- Longer sessions (30–60 minutes) may suit educational or in-depth topics, but require planned interaction to sustain engagement.
Audio Quality vs Video Quality
Audio clarity is more critical than video resolution. Poor sound can drive viewers away faster than slightly blurry video. Use quality microphones and reduce background noise.
Lighting, Framing, and Background Tips
- Use natural light or soft LED lights.
- Frame yourself at eye level.
- Keep the background clean, branded, or relevant.
Visual appeal supports professionalism and viewer focus.
Stable Internet and Stream Setup Checklist
- Test upload speeds (3–5 Mbps minimum recommended).
- Close unnecessary applications to prevent lag.
- Consider a wired connection for stability.
Technical glitches erode trust and reduce watch time.
What to Do After Your Facebook Live Ends
Engagement doesn’t stop once you end the live session.
Repurpose Your Live Video for Ongoing Reach
- Post the recording on your page and other platforms.
- Clip key segments for short-form content on Reels or Stories.
Respond to Comments You Missed
Engage viewers who commented after the live session. This shows attentiveness and encourages future interaction.
Analyze Facebook Live Insights and Engagement Metrics
Metrics to review:
- Total watch time
- Peak concurrent viewers
- Comment and reaction patterns
- Retention graphs
Use Engagement Data to Improve Future Streams
Identify what worked, what dropped off, and adjust topics, formats, and timing for the next broadcast.
Common Facebook Live Mistakes That Kill Engagement
Avoiding pitfalls is as important as applying best practices.
Waiting Too Long to Start Valuable Content
Viewers lose interest if the first minutes lack value. Start strong and deliver immediately.
Ignoring Comments or Viewer Feedback
Not responding to interactions makes the session feel one-sided and reduces engagement.
No Clear Call to Action
Without CTAs, viewers may leave without following, subscribing, or engaging further.
Overly Long or Unfocused Live Sessions
Extended tangents or unclear structure cause drop-offs. Keep content tight, planned, and interactive.
Facebook Live Tools That Help Increase Engagement
The right tools can enhance both technical quality and viewer interaction.
Streaming Software and Overlays
Platforms like OBS Studio, StreamYard, and Ecamm Live allow:
- On-screen overlays
- Branding graphics
- Multi-camera setups
Microphones and Webcams for Clearer Streams
- USB condenser microphones or lapel mics improve audio.
- High-definition webcams provide professional-looking visuals.
Scheduling and Analytics Tools
- Facebook Creator Studio or Meta Business Suite helps schedule streams.
- Analytics tools track engagement, retention, and conversion metrics.
FAQs
How do I keep viewers watching my Facebook Live longer?
Start with a strong hook, tease upcoming content, interact frequently, and offer live-only incentives to maintain attention.
What is the best length for a Facebook Live video?
Short sessions (10–20 minutes) work for casual engagement. Educational or deep-dive topics can extend to 30–60 minutes with planned interaction.
How does Facebook rank live videos in the algorithm?
Live streams are ranked based on real-time engagement, watch time, comments, shares, and reactions. Interaction directly boosts reach.
Do comments and reactions really boost Facebook Live reach?
Yes. Facebook’s algorithm interprets engagement as relevance, promoting interactive streams over passive ones.
How can businesses use Facebook Live to increase engagement?
By planning topics, interacting with viewers, providing incentives, and analyzing insights, businesses can foster community, brand trust, and higher conversions.
Is Facebook Live still worth it in 2026?
Absolutely. Live streaming remains a key tool for real-time connection, audience retention, and visibility across Facebook’s algorithm.
Final Words
Facebook Live is a powerful tool when used strategically. From planning your topic and scheduling to real-time interaction and post-stream analysis, every stage impacts engagement and reach. By applying these Facebook Live best practices, you can keep viewers hooked, boost interaction, and turn live streams into meaningful connections and measurable results.
Feb 15, 2026 | Facebook tips
Building trust on Facebook is harder than ever. With crowded feeds and shrinking organic reach, people often judge your page in seconds and comments play a major role in that judgment. A post with active discussions feels credible, popular, and worth engaging with. That’s why many brands, creators, and businesses explore ways to buy Facebook comments as part of a broader growth strategy.
When done carelessly, buying comments can backfire. When done strategically and ethically, it can strengthen social proof, spark real conversations, and improve engagement momentum. This guide explains how to do it safely, responsibly, and effectively without putting your page at risk.
Why Facebook Comments Matter for Social Proof
Facebook comments do far more than fill space under a post. They influence how users perceive your brand and how the algorithm treats your content.
How Comments Influence Credibility
Humans follow signals. On Facebook, comments are one of the strongest indicators of social proof.
When users see a post with thoughtful comments, they subconsciously assume:
- The page is active and trusted
- The content is worth reading
- Other people find value in it
In contrast, a post with zero or very few comments—even with likes—can look ignored or unimportant. Comments validate your message and reduce hesitation for new visitors.
For businesses, this credibility can directly affect:
- Click-through rates
- Page follows
- Conversions and inquiries
That’s why many marketers see comments as just as important as likes or shares.
Engagement Metrics That Impact Reach
Facebook’s algorithm prioritizes content that generates interaction. Comments are weighted more heavily than likes because they require more effort.
Comments signal:
- Meaningful engagement
- Time spent on the post
- Community interest
More comments often lead to:
- Increased organic reach
- More visibility in followers’ feeds
- Higher chances of being shown to new audiences
Buying Facebook comments doesn’t replace quality content but it can help kickstart engagement so your posts don’t disappear unnoticed.
Risks of Buying Facebook Comments
Before you decide to purchase Facebook comments, it’s essential to understand the risks. Not all services are equal, and shortcuts can damage your page if you’re careless.
Fake Comments vs. Real Engagement
The biggest danger is low-quality, fake comments.
Common red flags include:
- Generic phrases like “Nice post” or “Great pic”
- Irrelevant comments that don’t match the content
- Repeated wording across multiple posts
- Accounts with no profile photos or activity
These comments don’t just look bad they signal manipulation. Savvy users notice them instantly, which can reduce trust instead of building it.
Real Facebook comments should:
- Match the topic of the post
- Sound natural and conversational
- Appear gradually, not all at once
Quality always matters more than quantity.
Potential Account Penalties and Platform Rules
Facebook discourages artificial engagement. While buying comments isn’t explicitly illegal, aggressive or spammy tactics can trigger:
- Reduced reach (shadow limiting)
- Removal of comments
- Temporary page restrictions
- In extreme cases, account suspension
Risk increases when you:
- Buy large volumes instantly
- Use bot-driven services
- Combine comments with fake likes and followers
Safe providers focus on moderation, realism, and compliance with platform behavior patterns.
How to Avoid Scams
The market for Facebook comment services is crowded—and not all sellers are legitimate.
Watch out for:
- Promises of “instant” thousands of comments
- Extremely low prices that seem unrealistic
- No refund or replacement policy
- No explanation of how comments are delivered
A trustworthy provider is transparent, realistic, and focused on long-term value—not shortcuts.
Step-by-Step Guide to Buying Facebook Comments
Buying comments safely isn’t complicated, but it does require planning and attention to detail.
Choosing a Reputable Service Provider
Start by evaluating the provider carefully. A reliable Facebook comment service should offer:
- Real or realistic-looking accounts
- Custom or niche-relevant comments
- Gradual delivery over time
- Secure checkout and data protection
Reputable platforms like boost social media focus on quality engagement rather than spammy volume, which helps protect your page credibility.
Before ordering, check:
- Reviews or testimonials
- Sample comments
- Customer support responsiveness
If a service refuses to explain how comments are generated, that’s a warning sign.
Understanding Packages and Pricing
Pricing for buying Facebook comments varies based on:
- Number of comments
- Custom vs. generic comments
- Speed of delivery
- Targeting options (language, niche, location)
Typical costs range from a few dollars for small packages to higher rates for fully customized, high-quality comments.
Choose packages that:
- Match your page size
- Look natural relative to your likes and shares
- Align with your posting frequency
Avoid overloading a single post with excessive comments.
Placing Your Order Safely
To place an order responsibly:
- Select the specific post you want to boost
- Decide on comment style (questions, opinions, short reactions)
- Choose gradual delivery
- Double-check spelling, tone, and relevance
Never share your Facebook password. Legitimate services only need the post URL.
After delivery, monitor engagement and respond to comments when possible to increase authenticity.
Best Practices to Maximize the Impact of Purchased Comments
Buying comments works best when combined with smart content and active management.
Combining Organic and Paid Engagement
Purchased comments should complement not replace organic interaction.
To blend both effectively:
- Reply to comments yourself
- Ask follow-up questions
- Pin high-quality comments
- Encourage followers to join the conversation
This creates a natural discussion flow instead of a static comment block.
Monitoring Your Page Analytics
Track performance after buying comments to ensure they’re helping.
Key metrics to watch:
- Reach and impressions
- Comment-to-like ratio
- Profile visits
- Follower growth
If engagement improves steadily, your strategy is working. If reach drops, reassess volume or provider quality.
Encouraging Real User Interaction
Use purchased comments as conversation starters.
Examples:
- Comments that ask questions
- Comments that share opinions
- Comments that highlight benefits
When real users see activity, they’re more likely to respond—turning initial paid engagement into genuine discussion.
Alternatives to Buying Facebook Comments
Buying comments isn’t the only way to build social proof. Many pages combine it with organic strategies for long-term growth.
Content Strategies for Organic Engagement
Strong content naturally attracts comments.
Focus on:
- Opinion-based posts
- Polls and open-ended questions
- Relatable stories
- Behind-the-scenes updates
The more emotional or relatable the post, the higher the chance of organic interaction.
Running Facebook Ads to Boost Comments
Engagement-focused ads can drive real comments from targeted audiences.
Benefits include:
- High-quality interactions
- Audience targeting
- Long-term page growth
The downside is cost. Ads are effective but require ongoing budget and testing.
Community-Building Techniques
Building a loyal community takes time but pays off.
Tactics include:
- Responding to every comment
- Featuring user-generated content
- Hosting live sessions
- Creating Facebook Groups
These methods reduce reliance on paid engagement over time.
Case Studies / Examples (Optional for Authority)
Pages That Benefited from Strategic Comment Boosts
Many small brands use limited purchased comments to overcome the “empty post” problem.
Common patterns include:
- New pages using comments to build early credibility
- Product launches gaining traction through discussion
- Local businesses increasing inquiries after visible engagement
The key factor is moderation—small boosts combined with real interaction.
Lessons Learned from Poor Engagement Tactics
Pages that fail often make the same mistakes:
- Buying too many comments at once
- Using irrelevant or spammy comments
- Ignoring real user replies
These tactics damage trust and reduce reach. Strategic use avoids these pitfalls.
Frequently Asked Questions (FAQs)
Is it safe to buy Facebook comments?
Yes, it can be safe if you use reputable providers, choose realistic volumes, and avoid spammy or automated services.
How much does it cost to buy Facebook comments?
Prices vary based on quality and customization. Basic packages can start at a few dollars, while premium custom comments cost more.
Will buying comments increase real engagement?
Purchased comments can encourage real users to join discussions, especially when paired with strong content and active replies.
Can Facebook detect purchased comments?
Facebook may detect unnatural behavior patterns. Using gradual delivery and realistic comments reduces risk significantly.
What’s the best service to buy Facebook comments?
The best service offers real-looking comments, customization, transparent policies, and secure ordering without asking for account access.
Are there alternatives to buying comments for social proof?
Yes. Organic content strategies, Facebook ads, and community-building can all generate comments naturally.
How do purchased comments impact my page credibility?
High-quality, relevant comments can improve perceived credibility. Low-quality or fake-looking comments can damage trust.
Feb 13, 2026 | Facebook tips
Facebook has grown into much more than a platform for personal connections. For businesses, creators, and marketers, it has become a crucial channel for reaching audiences and building community.
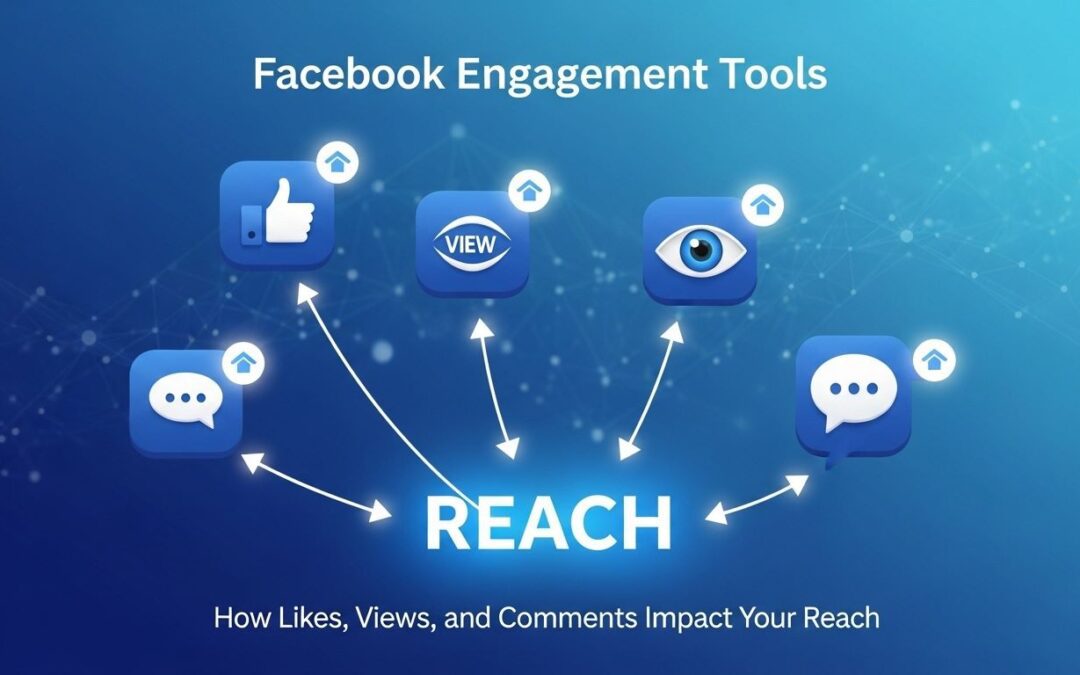
Success on Facebook is driven not just by posting content but by understanding how users engage with it. Likes, views, and comments the core engagement tools play a critical role in determining how far your posts reach and how the algorithm responds. In this article, we’ll explore each engagement metric, explain how they influence reach, and share strategies to maximize impact.
What Are Facebook Engagement Tools?
Facebook engagement tools are metrics that track how users interact with your content. At their core, they consist of likes, views, and comments. While likes are quick reactions, views measure exposure, and comments represent deeper user interaction. Together, they provide insights into audience behavior and content performance.
Tracking engagement is not merely about seeing who appreciates your posts. These metrics help you understand what content resonates, which strategies drive interaction, and how to optimize your posting schedule for maximum visibility. By monitoring engagement, you can adapt your content to meet audience preferences and improve organic reach without relying solely on paid promotions.
Understanding Facebook Likes
Likes are one of the earliest forms of engagement on Facebook, but they continue to hold importance. There are two primary types: the standard like and the newer reactions. Standard likes are simple acknowledgments, while reactions love, laughter, wow, sad, or angry convey a specific emotional response. This allows you to gain insight not only into whether your audience appreciates a post but also how it makes them feel.
In terms of reach, likes are considered passive engagement. They show that users noticed and approved of your content, signaling to Facebook that it is worth promoting. However, while likes help with initial visibility, they are not as influential as comments or shares when it comes to algorithmic prioritization. To earn more likes, focus on posting visually appealing content, creating concise and compelling captions, and tapping into current trends or popular topics. Understanding the preferences of your audience through Facebook Insights can guide you in tailoring content that resonates.
Decoding Facebook Views
Views are a measure of exposure, but their significance depends on content type. Video views differ from post views. Video views are counted when someone watches for at least three seconds, while post views reflect how often content appears on a user’s screen. High view counts indicate reach, but they do not guarantee interaction.
The Facebook algorithm evaluates not only the number of views but also engagement relative to those views. For example, a video with high watch time signals quality content, increasing the likelihood of algorithmic promotion. Conversely, content with high views but low interaction may indicate it is not capturing user interest. Tracking and analyzing views through Facebook Insights or analytics platforms helps identify which content draws attention and keeps viewers engaged.
The Role of Comments in Facebook Engagement
Comments are the clearest sign of active engagement and are more influential than likes or views in driving reach. They require users to invest time and thought, making them a strong signal to Facebook that your post is meaningful. Posts with comments often appear higher in newsfeeds because they encourage conversation and ongoing interaction.
Encouraging comments requires creating content that invites discussion. Asking questions, sharing personal stories, or presenting topics that elicit opinions naturally sparks interaction. Responding to comments promptly amplifies their impact. When users see that their input is acknowledged, they are more likely to engage again, creating a cycle of meaningful interaction that benefits your page’s visibility.
Comparing Likes, Views, and Comments
Not all engagement metrics carry the same weight. Likes are useful for social proof and can attract attention initially, but they are the least influential in terms of algorithmic reach. Views measure exposure and potential interest but are most effective when paired with other interactions.
Comments, on the other hand, provide the strongest signal of active engagement, often leading to higher organic reach. Understanding the interplay of these metrics allows you to focus on creating content that drives meaningful interaction rather than chasing superficial approval.
Strategies to Boost Facebook Engagement
Maximizing engagement on Facebook requires a strategic approach. Posting at times when your audience is most active ensures your content gets noticed. Consistency is important, but quality should never be sacrificed for quantity. Content that sparks conversation—such as thought-provoking questions, personal anecdotes, or insights into trends—invites users to interact.
Leveraging Facebook’s features, such as Stories, Reels, or interactive polls, expands the ways users can engage with your content. Stories offer short-lived, frequent interactions, while Reels have high potential for viral reach. Polls and question-based posts encourage direct participation, making your audience feel involved and connected to your page.
Measuring and Analyzing Engagement Metrics
Regularly reviewing engagement metrics is essential for refining your strategy. Facebook Insights provides detailed data on post reach, reactions, comments, shares, and demographics. Understanding engagement rate, calculated as total interactions divided by total reach, allows you to measure how effectively your content resonates with your audience.
Analyzing this data enables you to adjust posting times, content style, and topics to improve performance. Observing trends over weeks or months reveals what consistently drives interaction, helping you make informed decisions and optimize future campaigns.
Common Mistakes to Avoid With Facebook Engagement
One common pitfall is focusing solely on likes. While they provide social proof, relying only on likes can create a skewed understanding of engagement. Ignoring negative engagement is another mistake; reactions like “angry” or “sad” offer valuable feedback and should be addressed thoughtfully. Overposting or spamming content can also reduce engagement, as users may become overwhelmed or disengaged. Quality and relevance always take precedence over quantity.
Final Words
Understanding and leveraging Facebook engagement tools is essential for expanding reach and building a loyal audience. Likes offer social proof, views reflect exposure, and comments indicate active engagement the most influential metric for reach. By creating content that encourages interaction, analyzing performance metrics, and adjusting strategies accordingly, you can significantly enhance your presence on Facebook.
Focus on meaningful engagement rather than superficial metrics, experiment with different content types, and maintain consistent interaction with your audience. These steps ensure your posts not only reach more people but also foster a genuine connection with your community.
Feb 12, 2026 | Facebook tips
Facebook remains a powerful platform for connecting with audiences, building communities, and growing brands. But in today’s crowded newsfeeds, creating posts that actually capture attention is harder than ever. Understanding how to craft Facebook posts that get more likes and comments is key to improving your engagement rate, boosting organic reach, and building lasting relationships with your audience.
This guide will walk you through actionable strategies, proven post formats, writing techniques, and visual tactics to make your Facebook content more engaging.
Why Facebook Engagement Matters More Than Ever
Engagement on Facebook is more than just vanity metrics. Likes, comments, and shares directly influence how the platform prioritizes your content.
How Likes and Comments Affect the Facebook Algorithm
Facebook’s algorithm favors posts that spark interaction. When your audience reacts, comments, or shares your post, it signals to the algorithm that your content is valuable. As a result:
- Your post reaches more people organically.
- Followers see your content sooner in their newsfeeds.
- Pages with higher engagement rates tend to enjoy stronger long-term visibility.
Engagement vs Reach: What Actually Moves the Needle
Reach alone doesn’t guarantee results. A post with thousands of views but no interaction has limited impact. Engagement drives conversations, builds trust, and often converts casual followers into loyal fans. Focusing on interaction, not just exposure, ensures your posts have a measurable effect on your goals.
Understand Your Audience Before You Write
You can’t create content in a vacuum. To resonate with your followers, you need to know who they are and what matters to them.
Identifying Audience Pain Points and Interests
Successful Facebook posts address real challenges or desires your audience experiences. Conduct research by:
- Reviewing comments on past posts to spot common questions.
- Checking Facebook Insights for demographic data.
- Observing what content competitors’ followers engage with.
Matching Post Tone to Audience Expectations
Your audience expects consistency. If your brand voice is friendly and humorous, a stiff, corporate tone can feel off-putting. Matching your tone to expectations builds familiarity and trust.
Why Relevance Beats Frequency
Posting more often isn’t always better. Irrelevant or filler posts can reduce engagement. Prioritize high-quality, relevant content over sheer volume to maintain your audience’s interest.
Proven Facebook Post Formats That Drive Engagement
Certain post structures consistently generate higher likes and comments. Experiment with these formats to see what resonates.
Question-Based Posts (and Why They Work)
Asking questions invites direct responses. For example:
- “What’s the one productivity tip you can’t live without?”
- “If you could travel anywhere right now, where would it be?”
These posts create a low-effort entry point for engagement, triggering discussion and increasing visibility.
Short Storytelling Posts
Narratives capture attention. Share brief stories that illustrate your brand values, customer experiences, or personal anecdotes. Keep them concise, with a clear takeaway.
Opinion & Hot-Take Posts
Controversial or thought-provoking statements spark debate. Just ensure your hot takes align with your brand voice and avoid unnecessary negativity. For example:
- “Remote work is the future—here’s why it’s better than office culture.”
Educational “Quick Tip” Posts
Quick, actionable tips are highly shareable. Use numbered lists, bullet points, or “Did you know?” formats to make learning simple and digestible.
Polls, Lists, and Interactive Prompts
Interactive content encourages participation. Polls, fill-in-the-blank prompts, and “caption this” posts invite followers to comment and share, boosting both engagement and organic reach.
Writing Techniques That Get More Likes and Comments
The way you write your post is as important as what you write.
The Power of Strong Opening Lines
Facebook truncates longer posts, so your first two lines must hook the reader. Start with a question, statistic, or intriguing statement that makes scrolling past impossible.
Using Emotional Triggers Without Clickbait
Posts that evoke emotion—humor, nostalgia, inspiration—tend to perform better. Avoid misleading clickbait, which can erode trust. Instead, be authentic and relatable.
Writing Clear, Low-Friction Calls-to-Action
Tell readers exactly what you want them to do without complicating the message. Examples:
- “Comment your favorite tip below.”
- “Share this if you agree.”
- “Vote in the poll!”
Why Simple Language Performs Better on Facebook
Complex sentences or jargon reduce readability. Keep language straightforward and conversational. Clear, concise wording encourages more interaction.
Visual Content That Boosts Engagement
Images, videos, and graphics often outperform text-only posts. Visuals help your content stand out in crowded feeds.
Images vs Videos vs Text-Only Posts
- Images: Quick to consume, effective for announcements or quotes.
- Videos: Higher retention rates; perfect for tutorials or storytelling.
- Text-only posts: Can work for strong questions or hot takes but usually require bold opening lines.
Best Image Styles for Facebook Engagement
Bright, high-quality visuals grab attention. Use authentic, relatable images instead of stock-heavy visuals to increase emotional connection.
Caption-First vs Visual-First Strategy
Some audiences respond better to captions that tell a story before the image, while others engage more with striking visuals first. Test both to see what drives more interaction.
Posting Strategy: Timing, Length, and Consistency
Even the best content underperforms without a smart posting strategy.
Best Times to Post on Facebook (General Guidelines)
While this varies by audience, studies suggest:
- Weekdays during lunch (11 AM–1 PM)
- Early evenings (5–7 PM)
- Weekends can work for lifestyle or entertainment content
Track your own analytics to identify peak engagement windows.
Ideal Post Length for Likes and Comments
- Short posts: 40–80 characters often perform well for questions or quick tips.
- Medium posts: 100–250 words ideal for storytelling or educational content.
- Long posts: Can work if highly engaging, but ensure strong openings and clear formatting.
How Often You Should Post (Without Killing Reach)
Consistency matters more than frequency. Aim for 3–5 quality posts per week. Overposting can overwhelm followers, reducing overall engagement.
Common Facebook Post Mistakes That Kill Engagement
Avoid these pitfalls to keep your content performing at its best.
Over-Promotional Content
Posts that focus solely on selling or self-promotion often see low engagement. Balance promotional posts with value-driven content.
Ignoring Comments and Conversations
Engagement is a two-way street. Responding to comments encourages ongoing interaction and builds community.
Posting Without a Clear Goal
Every post should serve a purpose—whether to educate, entertain, or spark discussion. Random posts without direction confuse your audience and weaken engagement signals.
Measuring and Improving Your Facebook Post Performance
Data-driven insights are essential for long-term success.
Metrics That Actually Matter (Beyond Likes)
Focus on meaningful metrics:
- Comment count (conversations)
- Share rate (reach expansion)
- Click-through rate (traffic impact)
- Engagement-to-reach ratio
Testing and Iterating Your Post Style
A/B test different formats, tones, and posting times. Track performance to understand what resonates with your audience.
When to Update or Repurpose High-Performing Posts
Successful posts can be repurposed for new audiences. Update visuals, tweak captions, or repost with minor changes to extend their lifespan.
FAQs
How many times should I post on Facebook per week?
Aim for 3–5 posts of high quality. Consistency matters more than volume.
Do longer posts perform worse on Facebook?
Not necessarily. Long posts work if they are engaging, structured, and have a strong opening.
Should I focus more on likes or comments?
Comments generally signal deeper engagement and are more valuable for organic reach.
Can visuals really improve engagement?
Yes. Posts with images or videos consistently outperform text-only posts in likes, comments, and shares.

Feb 10, 2026 | Facebook tips
Facebook remains one of the most powerful platforms for building brand awareness, driving traffic, and engaging an audience. Yet organic reach has steadily declined, making it harder for even high-quality posts to gain visibility. As competition increases, many businesses and creators explore ways to buy Facebook post likes to support their content and improve engagement signals.
The challenge is not whether buying likes works, but how to do it safely. Poor-quality services can harm your page, distort analytics, and weaken trust. Reputable strategies, on the other hand, can enhance visibility, support social proof, and complement organic growth.
This guide explains how to safely buy Facebook post likes, what risks to avoid, and how to combine paid engagement with sustainable Facebook marketing practices.
Why Buying Facebook Likes Can Be Risky
Buying Facebook likes becomes risky when it is done carelessly or through untrustworthy providers. Facebook actively monitors engagement patterns, and unnatural activity can quickly draw negative attention.
Understanding Facebook’s Rules on Engagement
Facebook’s policies emphasize authenticity. The platform does not prohibit promotion or third-party marketing support, but it does restrict artificial manipulation through bots, fake accounts, or deceptive tactics. Engagement is expected to come from real users interacting naturally with content.
Problems arise when likes are generated through automation or accounts created solely to inflate numbers. These patterns are easily detected and can reduce a page’s reach over time.
Risks of Fake Likes and Bots
Fake likes offer no long-term value. They do not comment, share, or convert, which lowers engagement rates and weakens post performance. When Facebook detects that engagement lacks depth, it often limits distribution rather than expanding it.
In addition, users can spot inauthentic engagement. Pages with high likes but little interaction often lose credibility, especially in competitive niches.
How Unsafe Practices Affect Your Account
Unsafe buying practices can lead to suppressed reach, removal of likes, or account restrictions. Even when penalties are not immediate, long-term visibility can suffer. This is why safety, pacing, and provider quality matter more than volume.
Benefits of Buying Facebook Likes Safely
When handled correctly, buying likes can support a broader Facebook growth strategy instead of undermining it.
Social Proof and Credibility
Social proof plays a major role in how people perceive content. Posts with visible engagement appear more relevant and trustworthy, which increases the likelihood that real users will stop scrolling and interact. This initial credibility can be especially valuable for new pages or campaigns.
Improved Post Visibility in the News Feed
Early engagement helps Facebook’s algorithm assess content value. A moderate number of authentic likes can signal relevance, improving the chances that a post appears in more news feeds. While likes alone are not enough, they often provide the momentum that organic engagement needs to start.
Faster Growth for New Pages
New Facebook pages typically struggle due to limited visibility and no engagement history. Carefully purchased likes can help overcome this early hurdle by making posts appear active and established, encouraging genuine users to join the conversation.
How to Identify Safe Facebook Likes Providers
Choosing the right provider is the most critical decision in the entire process. Quality providers focus on authenticity, transparency, and gradual delivery.
Look for Organic and Verified Services
Safe providers deliver likes from real accounts and avoid aggressive automation. They do not request login credentials and clearly explain how engagement is generated. Legitimate services focus on supporting visibility rather than manipulating metrics.
Platforms such as Boost-Social-Media.com position themselves in this category by emphasizing controlled delivery, realistic engagement patterns, and marketing-focused growth rather than spam-based tactics.
Check Reviews and Testimonials
Before committing to any service, review independent feedback and real user experiences. Consistent positive reviews, a professional website, and a visible online presence are strong indicators of legitimacy.
Avoid Free or “Unlimited” Like Offers
Free likes and unlimited engagement claims are almost always tied to bots or low-quality networks. These services may deliver numbers quickly, but they pose the highest risk to page health and long-term performance.
Step-by-Step Guide to Safely Buy Facebook Post Likes
A structured approach ensures that purchased engagement supports your strategy instead of disrupting it.
Step 1: Determine Your Engagement Goals
Start by defining what you want to achieve. Some brands use likes to improve visibility on key posts, while others aim to strengthen social proof during campaigns or launches. Clear goals help determine appropriate volume and pacing.
Step 2: Choose a Reputable Provider
Select a provider with a clear focus on safe delivery and real engagement. Services like Boost-Social-Media.com are designed for businesses that want controlled growth rather than inflated metrics, making them more suitable for long-term strategies.
Step 3: Set a Realistic Budget
Buying likes should be a measured investment. Small, consistent purchases tend to look more natural and deliver better results than large one-time spikes. Matching engagement levels to your page size helps maintain authenticity.
Step 4: Monitor Engagement Metrics
After purchasing likes, review performance closely. Look beyond the number of likes and assess reach, comments, shares, and follower growth. Healthy engagement patterns indicate that the strategy is working as intended.
Step 5: Avoid Sudden Spikes
Gradual delivery is essential. Likes that appear over time blend naturally with organic activity and reduce the risk of triggering algorithmic scrutiny.
Alternative Ways to Boost Facebook Engagement Organically
Buying likes is most effective when paired with organic engagement strategies that strengthen overall performance.
Optimize Post Timing and Frequency
Posting when your audience is most active significantly improves engagement. Facebook Insights can reveal optimal times and help refine posting schedules without increasing frequency unnecessarily.
Use Engaging Visuals and Captions
High-quality visuals and thoughtful captions drive interaction. Posts that invite opinions or spark discussion tend to perform better than purely promotional content.
Leverage Facebook Groups and Communities
Participating in relevant groups builds authority and encourages organic engagement. Sharing value-driven content within communities often leads to higher interaction than page-only posting.
Run Paid Ads Strategically
Facebook ads remain one of the safest growth tools when used correctly. Boosting high-performing posts through ads can amplify reach while maintaining full compliance with Facebook’s policies.
Tips to Maintain a Safe and Effective Facebook Growth Strategy
Long-term success on Facebook depends on balance and consistency.
Avoid Buying Likes Repeatedly
Purchased likes should support specific goals, not replace organic engagement. Overuse can distort analytics and reduce the effectiveness of future content decisions.
Mix Paid and Organic Engagement
The strongest pages combine strategic paid support with consistent organic interaction. This balance signals authenticity and improves overall engagement quality.
Track Analytics and Adjust Strategy
Regular analysis allows you to refine content, timing, and engagement methods. Pages that adapt based on data tend to grow more steadily and sustainably.
FAQs
Is it legal to buy Facebook likes?
Buying Facebook likes is legal. The risk lies in using fake or deceptive services that violate platform guidelines.
Can buying likes get my Facebook account banned?
Unsafe providers increase risk. Reputable services that deliver real engagement gradually are significantly safer.
How do I know if a Facebook likes provider is safe?
Safe providers are transparent, avoid unrealistic promises, and do not require account access.
Do purchased likes actually improve engagement?
They can support visibility and social proof, which often leads to increased organic interaction when combined with quality content.
What is the difference between fake likes and real likes?
Fake likes come from bots or inactive accounts. Real likes come from genuine users and support engagement metrics.
Are there alternatives to buying likes for engagement growth?
Yes. Content optimization, Facebook ads, and community participation are effective organic alternatives.
How many Facebook likes should I buy for a post to appear credible?
The number depends on page size and activity. Modest increases that align with existing engagement look the most natural.
Final Words
Buying Facebook post likes can be a valuable tool when approached professionally. The key is focusing on safety, authenticity, and balance rather than chasing numbers.
By choosing reputable providers such as Boost-Social-Media.com, setting realistic goals, and combining paid engagement with strong organic strategies, you can improve visibility without risking your account.
Used responsibly, purchased likes become a support mechanism enhancing reach, reinforcing social proof, and helping quality content perform as it should.
Feb 9, 2026 | Facebook tips
Building a thriving Facebook Group isn’t just about attracting members, it’s about creating a space where people feel connected, engaged, and motivated to participate. When managed effectively, Facebook Groups can turn casual followers into loyal advocates, foster meaningful conversations, and grow your brand organically. This guide will walk you step-by-step through setting up, growing, and managing a highly engaged Facebook community.
Why Facebook Groups Are Powerful for Community Building
Facebook Groups are not just an add-on to your social media presence they are central to creating deep, lasting engagement. Unlike Pages, Groups foster interaction, encourage peer-to-peer discussion, and provide a sense of belonging.
Organic Reach vs Facebook Pages
Facebook’s algorithm favors Groups for organic engagement. While Pages rely heavily on paid ads to reach followers, Groups naturally amplify posts among members. Content in Groups appears more frequently in members’ feeds, helping discussions grow without significant ad spend.
Trust, Belonging, and Peer-to-Peer Interaction
Groups create intimacy. Members often share personal experiences, ask questions, and offer advice. This peer-to-peer interaction builds trust faster than traditional social media channels. People return not just for content, but for community.
Who Should Use Facebook Groups
- Brands: To build loyal customer communities and gather feedback.
- Creators & Influencers: To connect directly with fans and foster engagement around content.
- Niche Communities: Hobbyists, professionals, or interest-based audiences benefit from focused, relevant discussions.
Choosing the Right Type of Facebook Group
Before you launch, it’s critical to define your group type and audience. Facebook offers three main options:
Public vs Private vs Hidden Facebook Groups
- Public Groups: Anyone can see the content and join. Ideal for broad awareness but limited privacy.
- Private Groups: Only members can see content. Membership approval allows better moderation and engagement.
- Hidden Groups: Invite-only or unsearchable, perfect for exclusive communities or VIP programs.
When to Use Each Group Type
- Use Public Groups to grow awareness quickly and attract new members.
- Use Private Groups for more controlled discussions and higher trust.
- Use Hidden Groups to reward top fans, clients, or partners with exclusive content.
Niche Clarity and Audience Alignment
Your group should have a clear focus. Generic groups often fail because members can’t identify the value. Narrow your niche, understand your audience, and define the problems your group will solve.
How to Set Up a Facebook Group for Engagement (Step-by-Step)
Proper setup lays the foundation for active participation.
Naming Your Group for Search and Relevance
- Include your niche or key topic in the name.
- Avoid vague or overly clever names that don’t communicate purpose.
- Example: “Digital Marketing Growth Hub” instead of “Marketing Friends.”
Writing a Compelling Group Description
Your description should clearly state:
- What the group is about
- Who should join
- The benefits of participation
Use bullet points to make it scannable and include keywords naturally for search visibility.
Setting Rules That Encourage Participation
Rules prevent spam and create a safe environment. Common rules include:
- No self-promotion without approval
- Be respectful and constructive
- Stay on topic
Consider including “participation rules” that encourage engagement, like commenting on introductions or contributing weekly.
Using Membership Questions Strategically
Membership questions help filter the right members and spark initial interaction. Ask questions like:
- “What’s your main goal for joining this group?”
- “Which topic interests you most?”
This also provides insights for content planning.
Content Strategies That Drive Engagement in Facebook Groups
Engaging content is the lifeblood of your community. Variety and consistency are key.
Daily, Weekly, and Recurring Content Formats
- Daily: Quick tips, polls, or motivational posts
- Weekly: Member spotlights, themed discussions, challenges
- Monthly: Webinars, live Q&As, or recap posts
High-Engagement Post Types
- Polls: Encourage opinions and spark conversation
- Discussion Prompts: Open-ended questions related to your niche
- Challenges: Encourage members to take action and share results
User-Generated Content and Discussion Starters
- Feature member stories, testimonials, or projects
- Ask members to share wins, tips, or questions
- Encourage collaboration by tagging and responding to each other
Content Calendar Best Practices
- Plan posts 2–4 weeks ahead
- Alternate between discussion starters, tips, polls, and multimedia
- Track engagement to see which content types resonate most
How to Keep Members Active and Involved
Sustained engagement requires ongoing effort and thoughtful interaction.
Welcoming New Members Effectively
- Use a pinned post or welcome message
- Encourage introductions and sharing goals
- Tag new members in discussion prompts to kickstart participation
Encouraging Conversations Without Spam
- Ask open-ended questions
- Avoid overposting—quality beats quantity
- Respond personally to member comments to foster connections
Gamification, Shoutouts, and Recognition
- Highlight top contributors weekly
- Create badges or recognition posts for active members
- Run friendly contests to boost participation
Managing Inactive Members Gracefully
- Identify members who haven’t engaged for months
- Offer them re-engagement options like surveys or updates
- Consider removing inactive accounts after extended periods to maintain activity rates
Moderation and Community Management Best Practices
Effective moderation ensures your group stays positive, safe, and productive.
Preventing Spam and Self-Promotion Abuse
- Set rules prohibiting unsolicited promotions
- Use automated post approvals for new members
- Encourage reporting of spam content
Handling Conflicts and Negative Behavior
- Address issues privately before public escalation
- Remove members who repeatedly violate rules
- Maintain a neutral, fair approach to disputes
When to Add Moderators or Admins
- When group size exceeds 500–1,000 members
- To handle multiple time zones or increased activity
- To specialize: content moderation, engagement, or technical tasks
Growing Your Facebook Group Organically
Organic growth relies on visibility, value, and community advocacy.
Promoting Your Group on Facebook and Beyond
- Share group posts on relevant Pages
- Mention your group in Facebook Lives or posts
- Collaborate with influencers in your niche
Using Your Email List and Website Traffic
- Add group links to newsletters and email signatures
- Embed signup buttons on your website
- Offer exclusive group content as an incentive
Collaborations and Cross-Promotion Strategies
- Partner with complementary groups or brands
- Co-host events or challenges
- Exchange promotion with non-competing niche communities
Measuring Engagement and Improving Performance
Tracking performance allows you to refine your strategy.
Key Facebook Group Metrics to Track
- Active members and daily interactions
- Comment and post rates
- New member growth vs drop-off
Using Facebook Group Insights
- Identify top-performing posts and engagement trends
- Monitor peak activity times
- Evaluate member demographics for targeted content\
Adjusting Content Based on Data
- Focus on content types driving the most interaction
- Experiment with new formats if engagement drops
- Address member feedback in future posts
Common Mistakes That Kill Facebook Group Engagement
Avoid these pitfalls to maintain an active and loyal community.
Overposting or Underposting
- Bombarding members with posts can overwhelm them
- Too few posts lead to stagnation and drop-off
Making the Group All About Selling
- Constant promotions erode trust
- Keep the focus on value, education, and community
Ignoring Member Feedback
- Regularly ask for suggestions
- Implement changes where possible
- Acknowledge feedback to show members they matter
Monetizing an Engaged Facebook Group (Optional but Strategic)
Once trust is established, monetization can be integrated without harming engagement.
Affiliate Recommendations Done Right
- Share products aligned with your niche
- Include personal experiences or case studies
- Avoid excessive promotion
Promoting Products Without Harming Trust
- Maintain a balance: 80% value, 20% promotion
- Make offers optional and non-intrusive
- Use pinned posts for relevant offers
Using Groups to Support Launches or Offers
- Provide early access or exclusive deals
- Create pre-launch discussions and polls
- Engage members in beta testing or feedback loops
Final Words
A Facebook Group is more than a list of members—it’s a living community. Focus on connection, consistency, and value. By creating meaningful interactions, maintaining active moderation, and using data to guide content, your Facebook Group can become a central hub for engagement, growth, and loyalty.